
Trial onboarding
The onboarding wizard is used for trial accounts. Accounts that are not in the trial onboarding state are redirected to the dashboard.
Step 1: Complete your profile
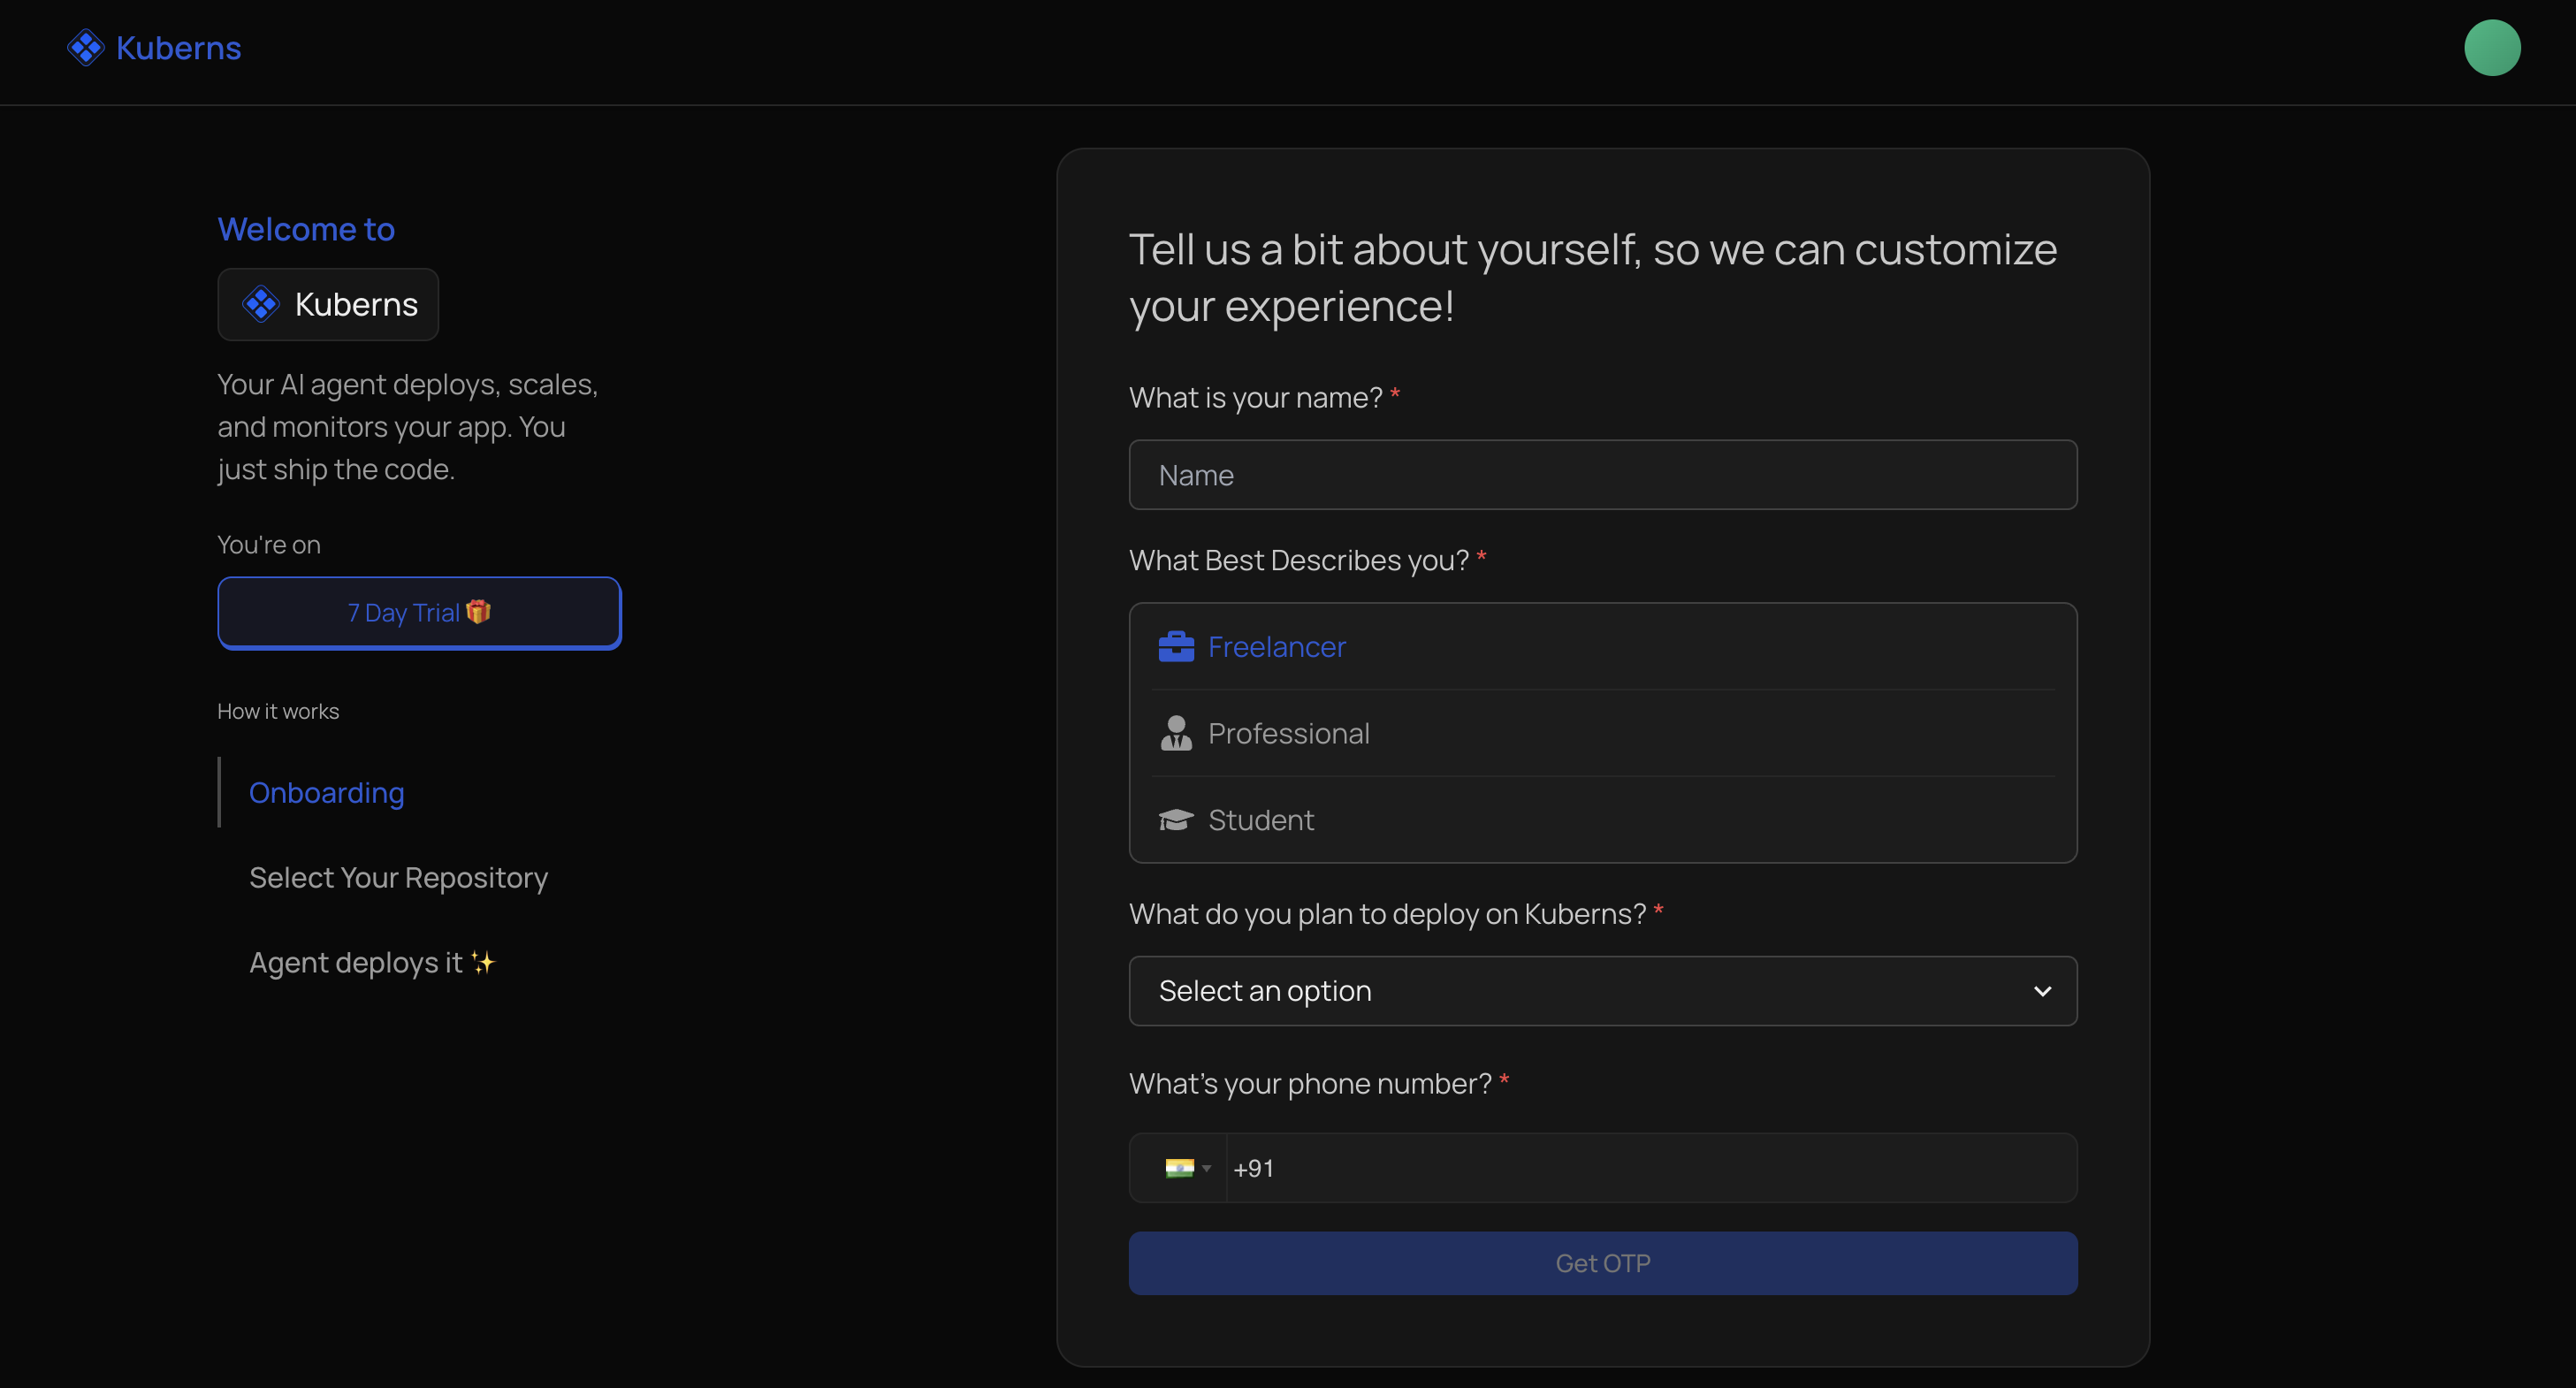
Provide:
- Your name.
- Your role.
- What you plan to deploy.
- Acceptance of the terms and conditions.
- Phone and OTP verification when required for your region.
The profile API accepts an optional referral code. The referral-code input is not rendered in every current onboarding release, so availability can depend on the entry flow.
Step 2: Select a deployment source
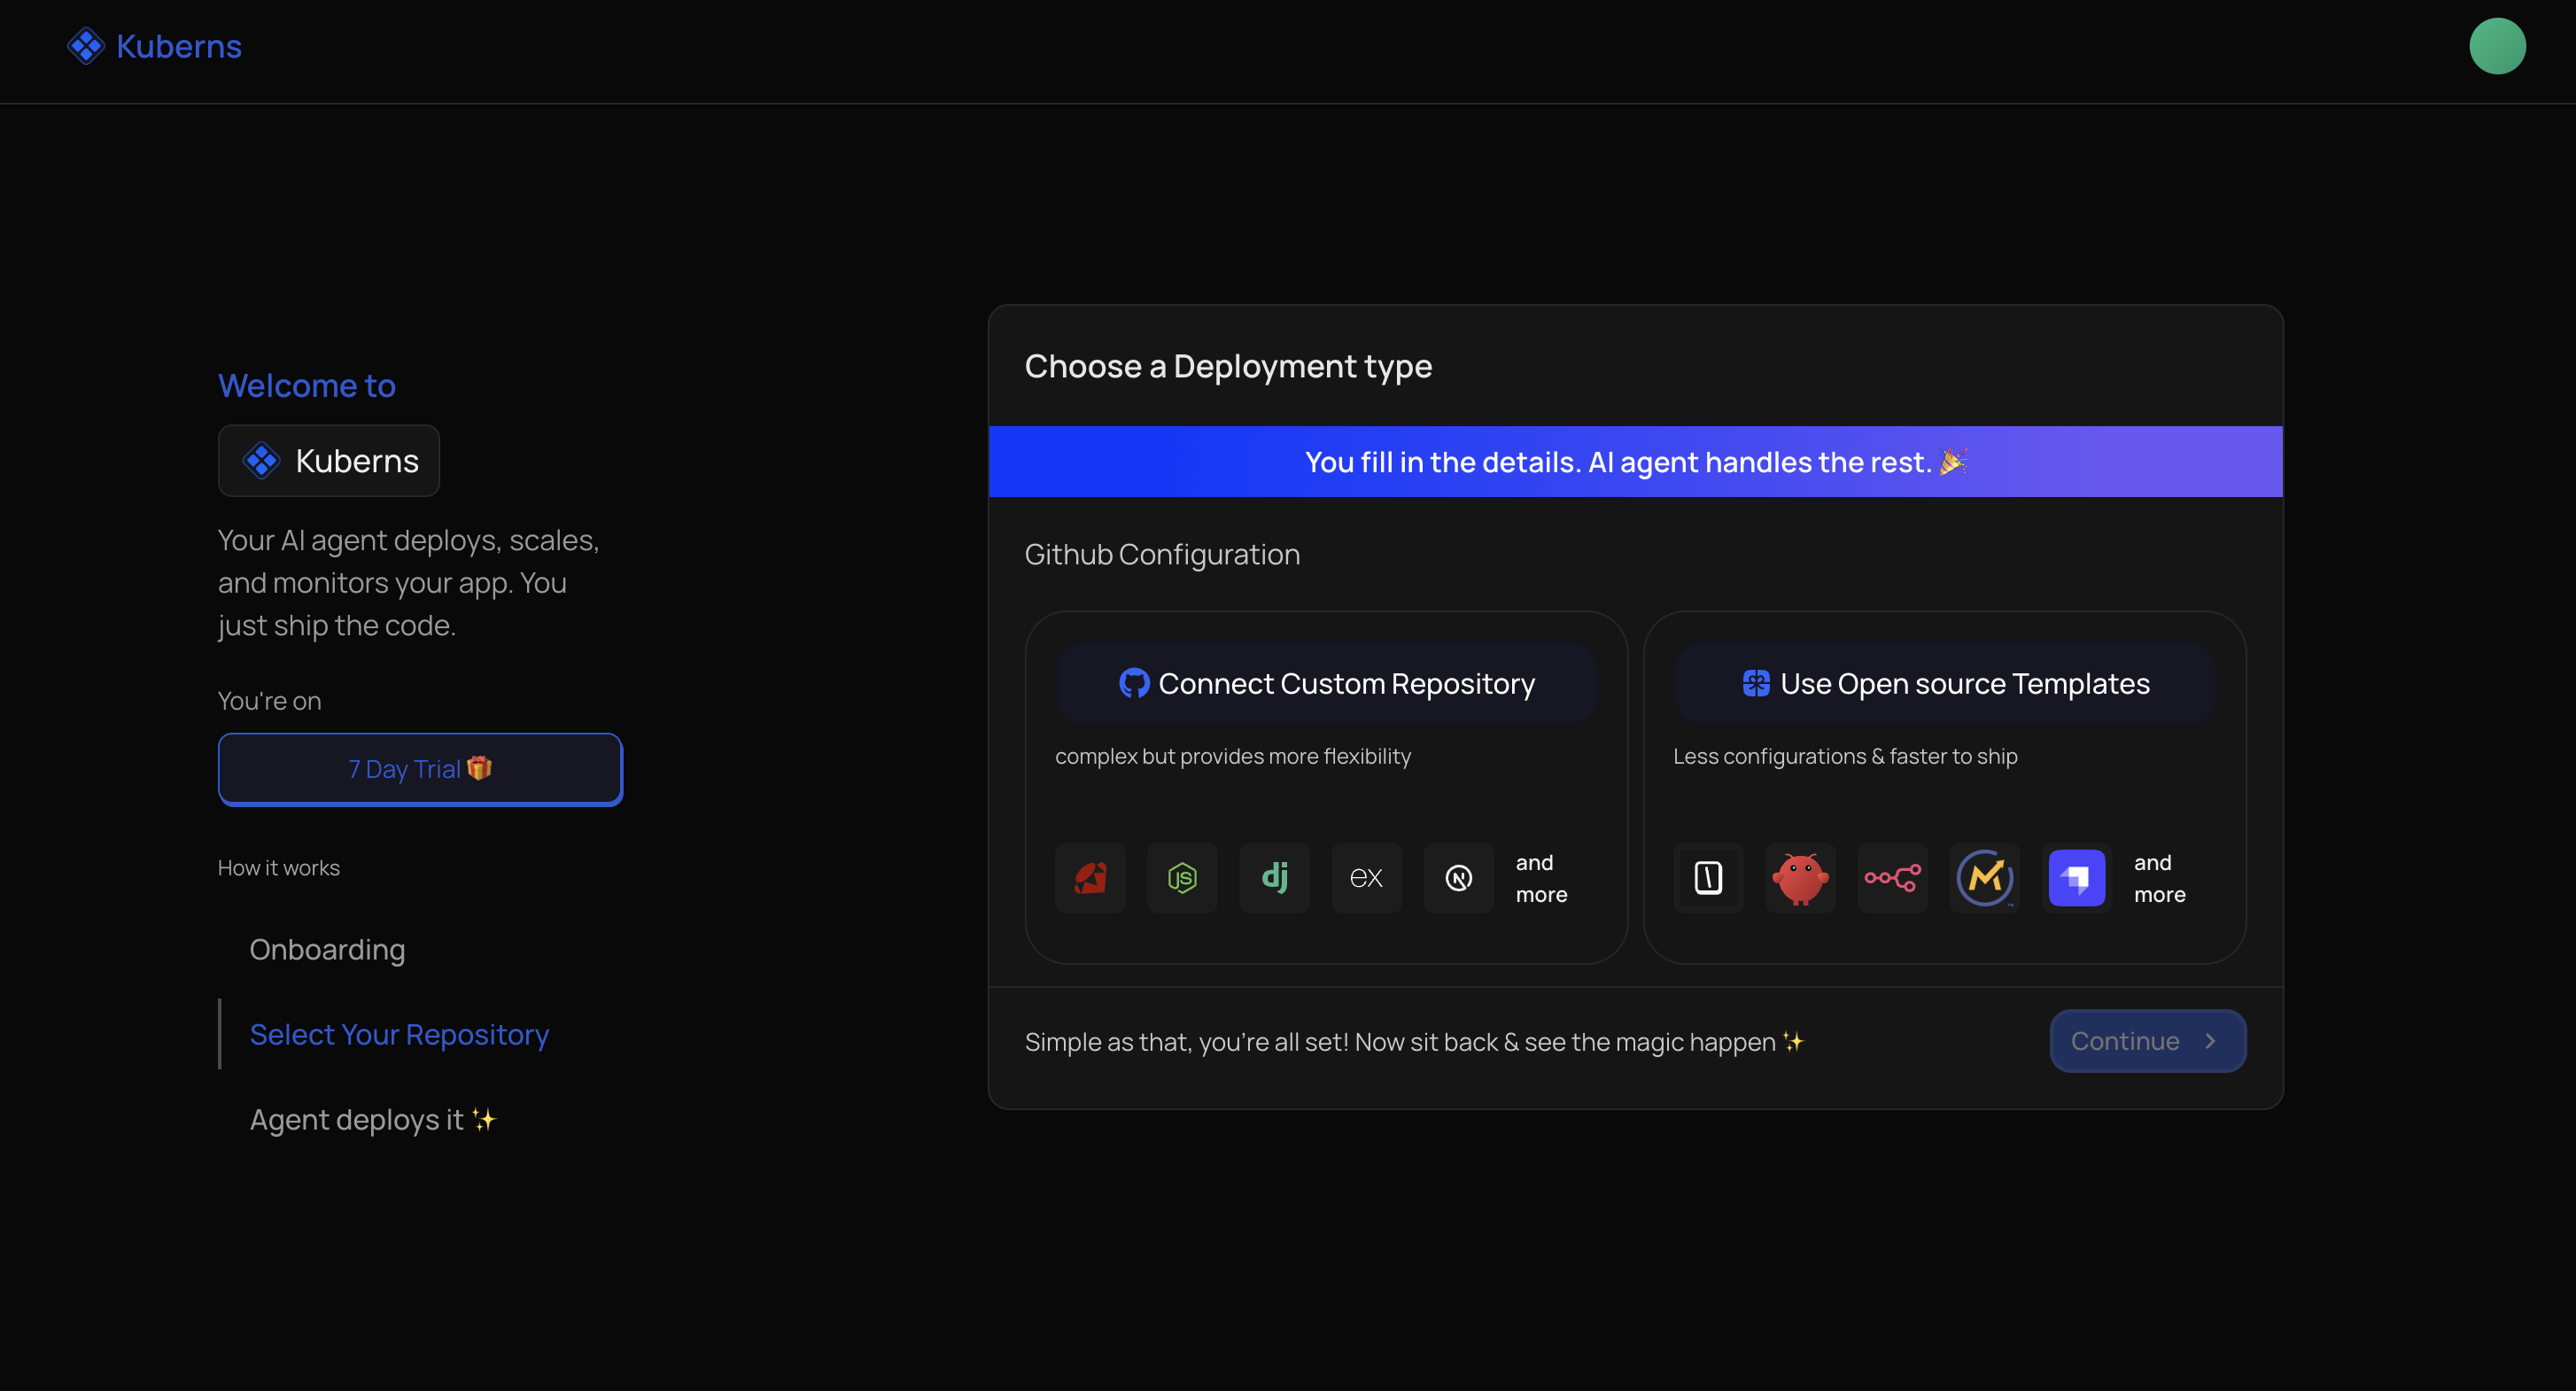
Choose one of:
- GitHub: install or select the Kuberns GitHub App, then choose an installation, repository, and branch.
- GitLab: authorize through OAuth, then choose a user or group, repository, and branch.
- Open-source template: select a template, region, resource configuration, and required environment values.
Available regions and template options are loaded from Kuberns at runtime.
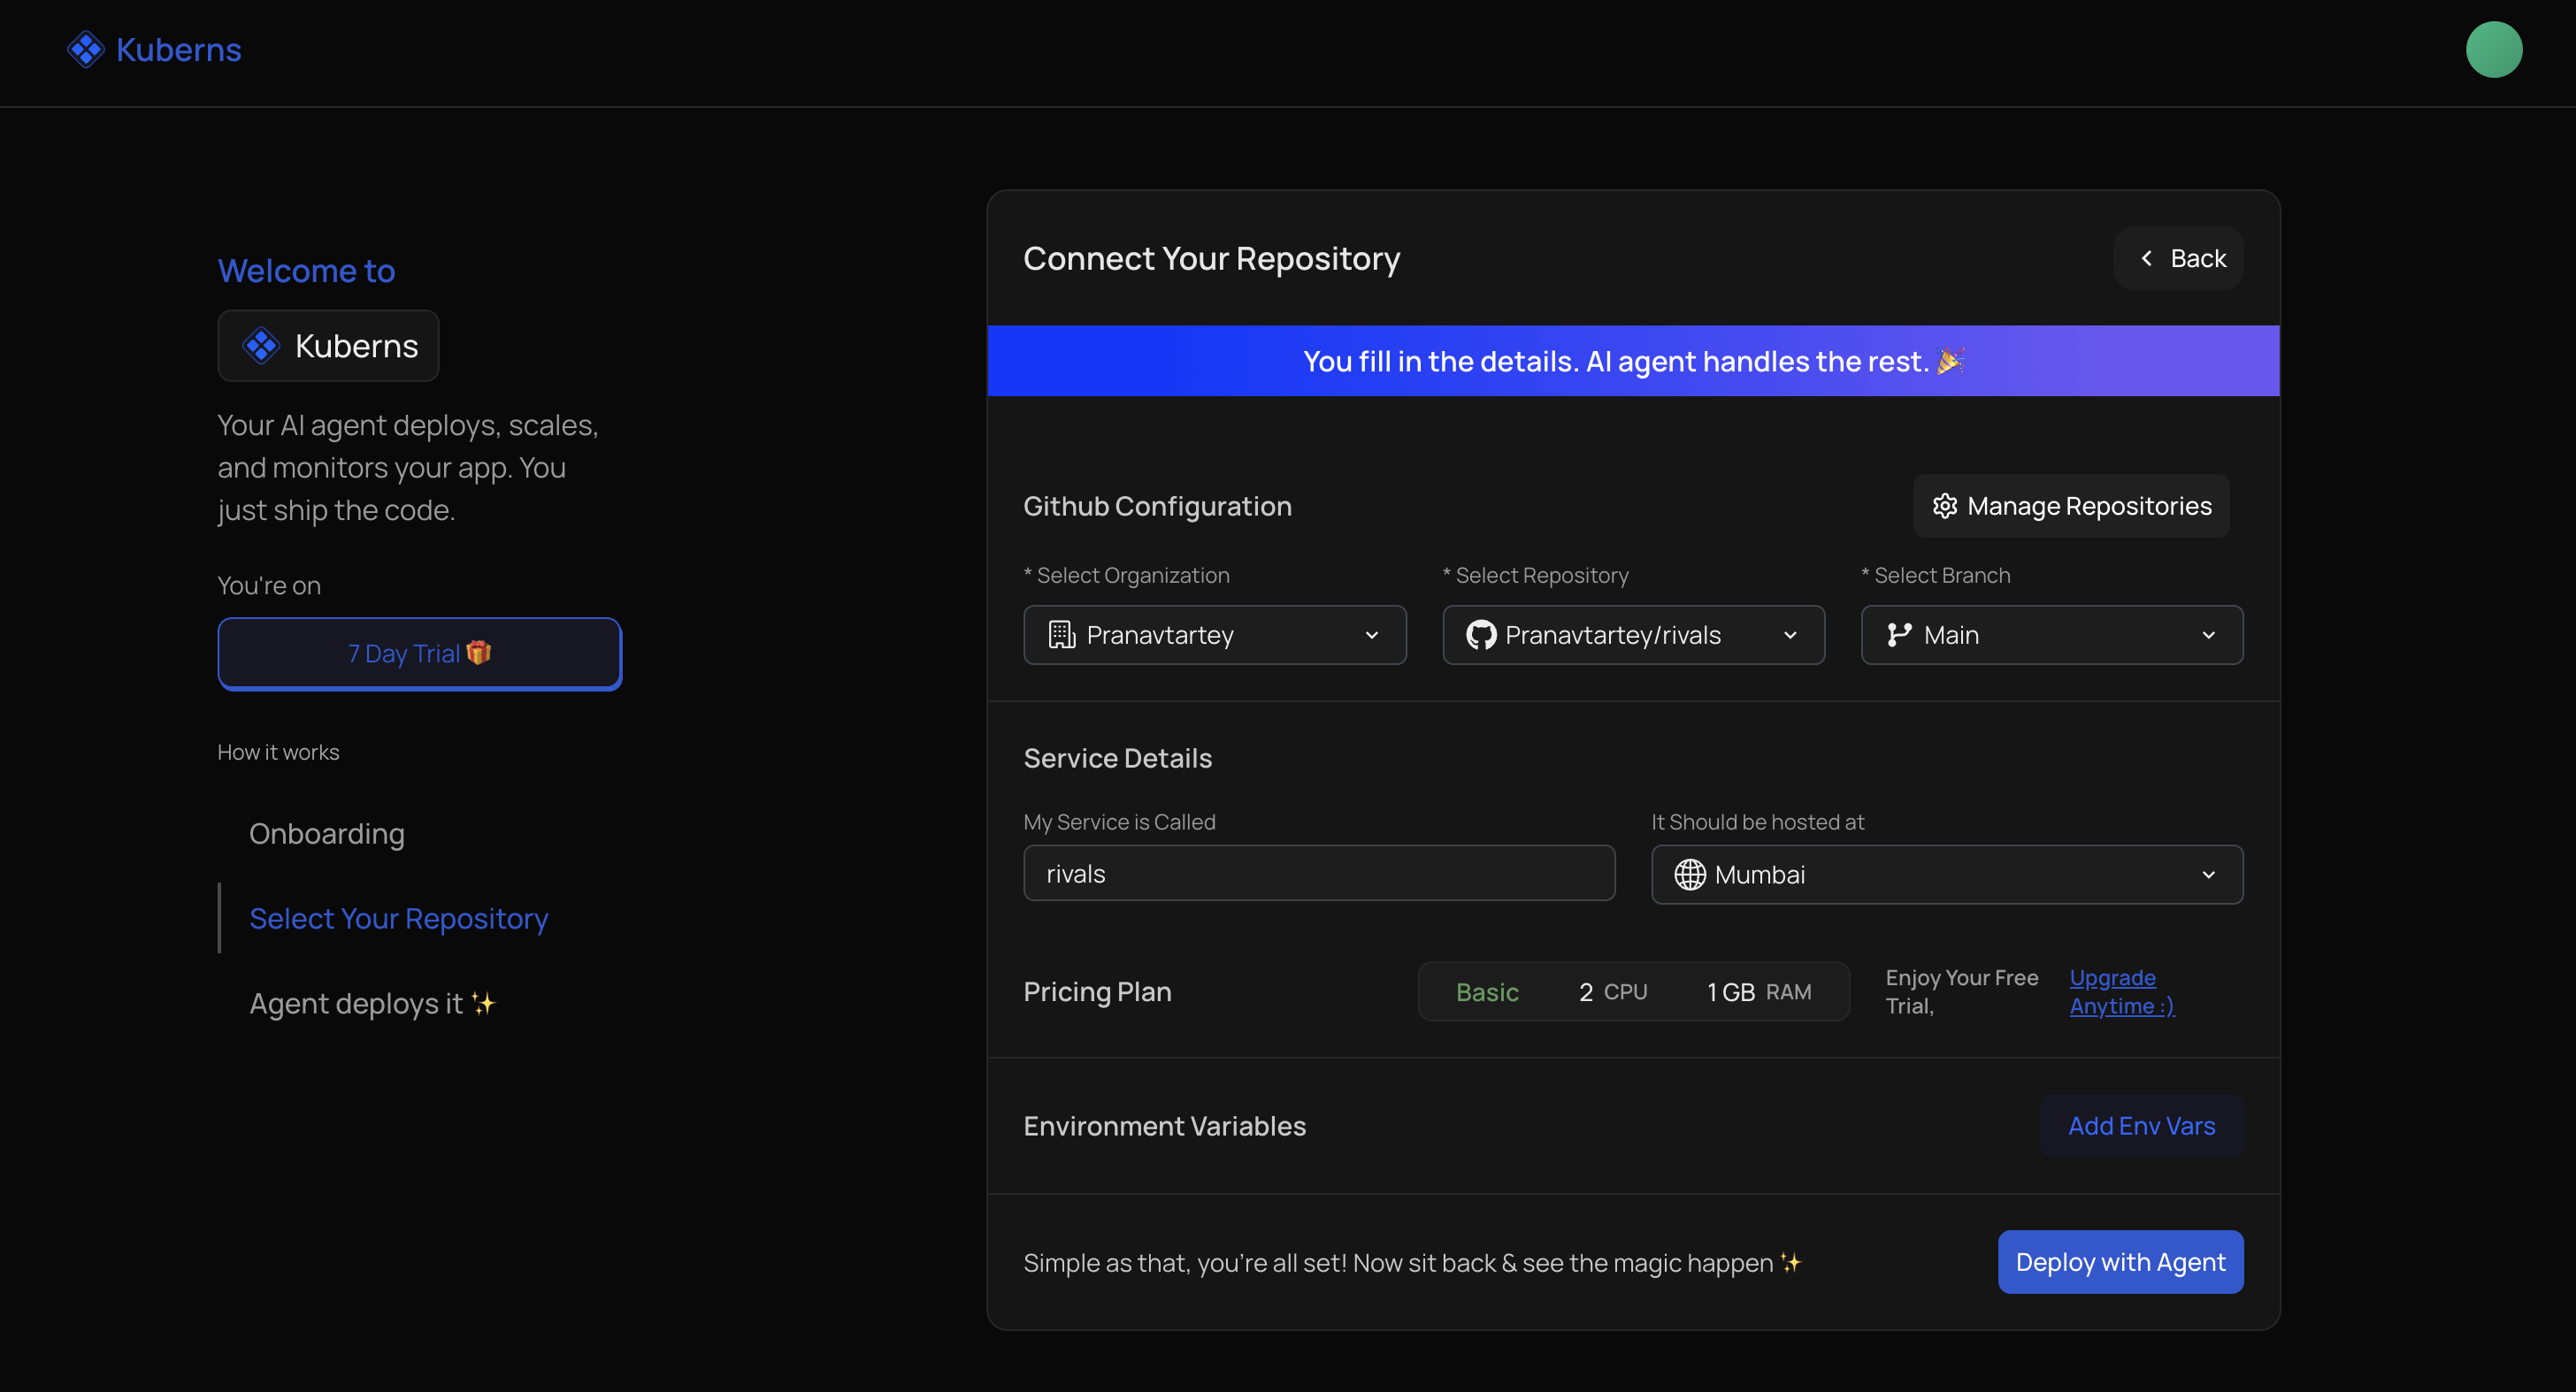
Step 3: Let the agent deploy
Kuberns creates the initial project, service, and environment, then starts a temporary AI agent. The page polls agent state and shows the live agent view after the session is running.
When analysis completes, Kuberns synchronizes the detected configuration, terminates the temporary agent host, and starts the standard build and deployment flow.
Read AI agent lifecycle for status and failure behavior.